
Disclaimer: You are responsible for making modifications to your truck. Subtle Design will not be held responsible if you damage your truck or any of its parts. Please take your time and enjoy the process.
Installation
Estimated Time: Less than 1 hour per side.
<——Please Read First!——>
Before installing, make sure to unlock your truck, leave the mirrors in the normal state (NOT folded), and put the driver and passenger windows down. It is recommended to disconnect the ground terminal from each of your batteries; this should prevent any DTCs while the mirrors are removed from the truck. All steps and photos in this install guide show installation for the passenger side. Installation for the driver side is identical.
Tools Needed
- Ratchet
- Inch pounds torque wrench
- 10mm socket
- 10mm wrench
- 2.5mm hex key
- Needle-nose pliers
- Drill
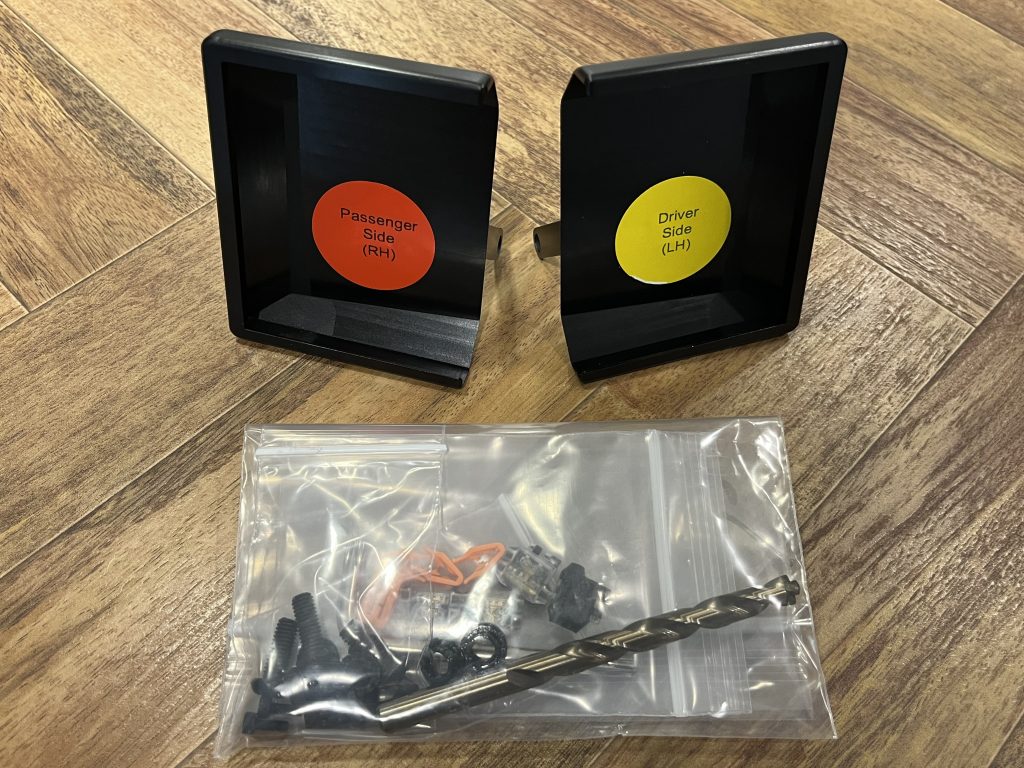
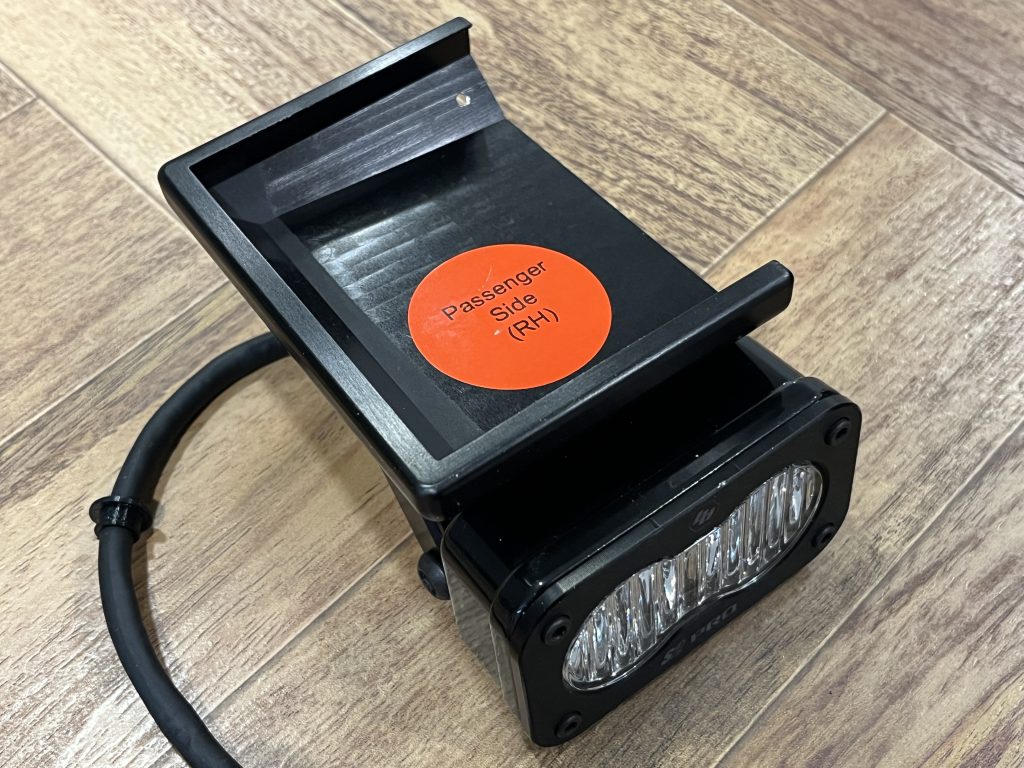
Photo showing the contents of your kit. There will be one passenger side (RH) and one driver side (LH) mirror mounts with pre-attached S2 light brackets already installed by us in the correct orientation. There will also be one hardware packet. The stickers on the mirror mounts can be left on, as they will not be visible once the mounts are installed.
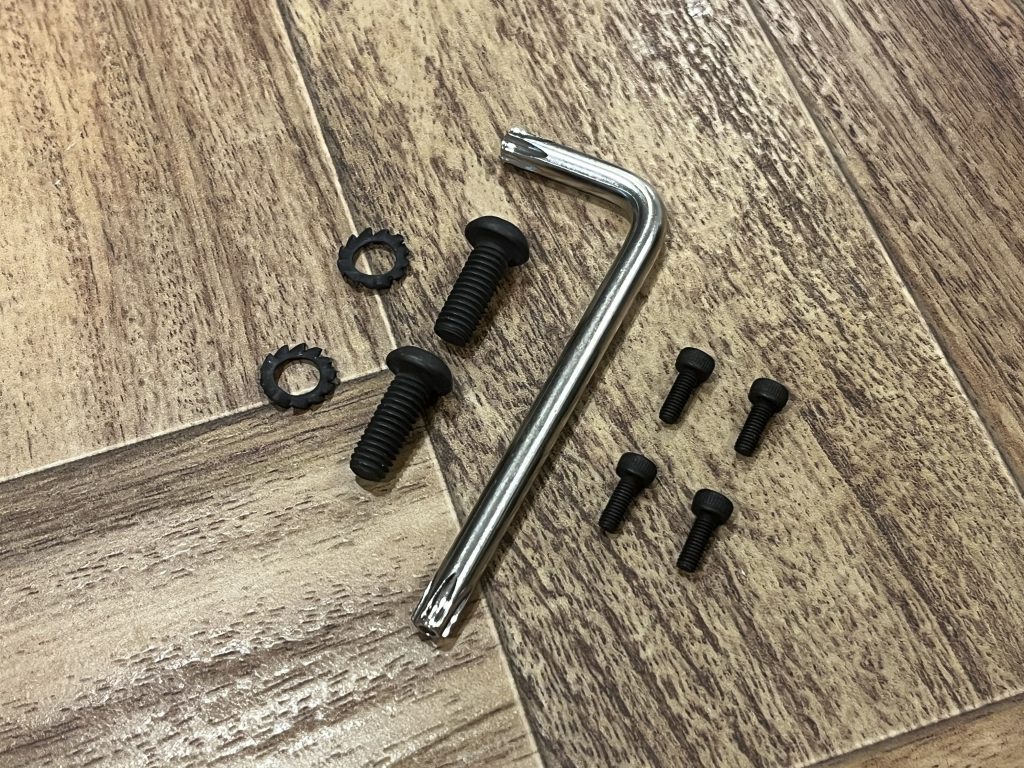
Step 1a: Find the bag of black oxide stainless steel hardware. Locate two serrated washers, two Torx button head security screws, and four M3 socket head cap screws. Find the security Torx L-wrench, located in the bag with the orange clips. Pre-assemble the S2 light as shown (photo below), making sure the cord exit at the back of the light is facing up towards you. The serrated washer needs to be in between the body of the S2 light and the light bracket.
You may use the four M3 socket head cap screws to swap out the factory shiny ones on the S2 light that hold the lens cover on; use a 2.5mm hex key to do this (not included). This is a good opportunity to make sure the text on the lens cover is also in the correct orientation. The text should appear upside down when the light is facing up towards you (as the next photo shows).
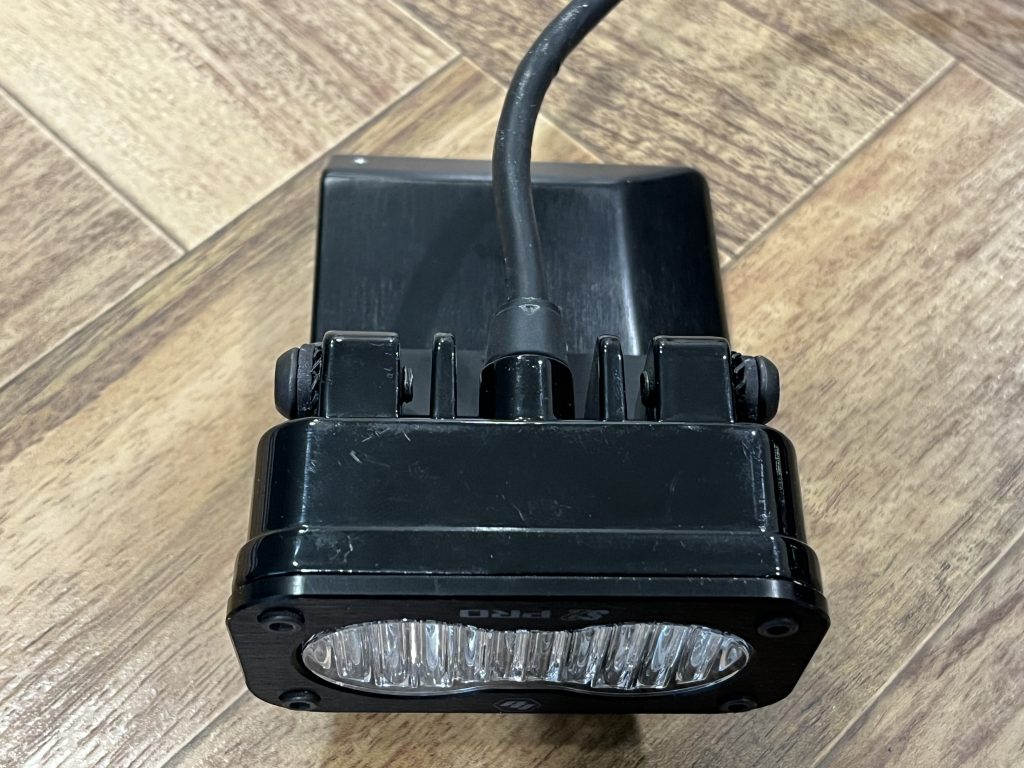
Step 1a (continued): Photo showing the light and lens cover installed in the correct orientations. Note the serrated washers are also in the correct spot: in between the body of the S2 light and the light bracket.
Step 1b: Locate one cord grommet from the hardware packet and slide it over the S2’s cord (If your light came with a connector pre-attached, cut the connector off closest to the body of the connector first). Please make sure to install the grommet with the smaller diameter side facing away from the light. You may use saliva on the cord to make it easier for the grommet to slide over.
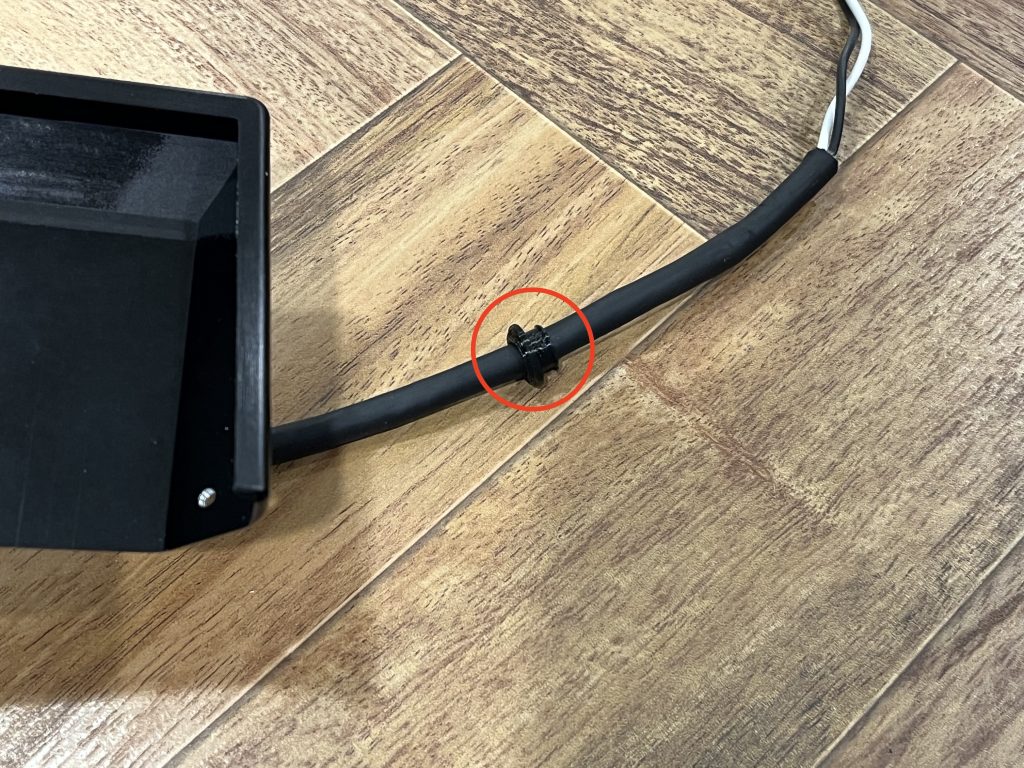
Step 1 completed: Photo showing the completion of Steps 1a and 1b. Note how the S2’s lens cover is in the correct orientation and the cord grommet’s small diameter side is facing away from the light.
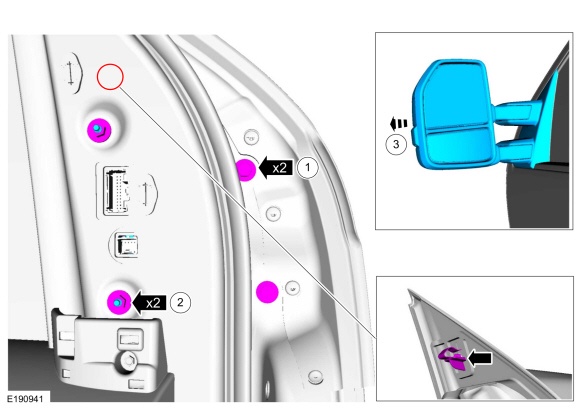
Step 2a: Remove the door trim ‘sail’ panel, which is held in place with two metal clips and two plastic clips. We have provided extra plastic clips in the hardware packet if any of the factory ones break.

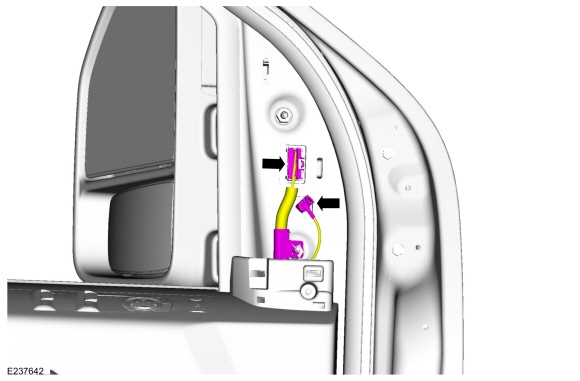
Step 2b: Depress the tab on the electrical connector(s) and unplug them.
Step 2c: Using a 10mm socket and ratchet, remove the two hex nuts and two bolts holding the mirror to the door; the lower hex nut’s stud has a wire harness retainer on it, so be sure to pull that off first. Pull outward on the mirror to remove it from the door. There is a spring steel clip/retainer that holds the mirror to the door. Be careful not to scratch the door when the mirror releases from the door! Please take care not to drop the mirror!
Step 3a: Remove the foam insulator from the mirror. Please take care not to tear it!
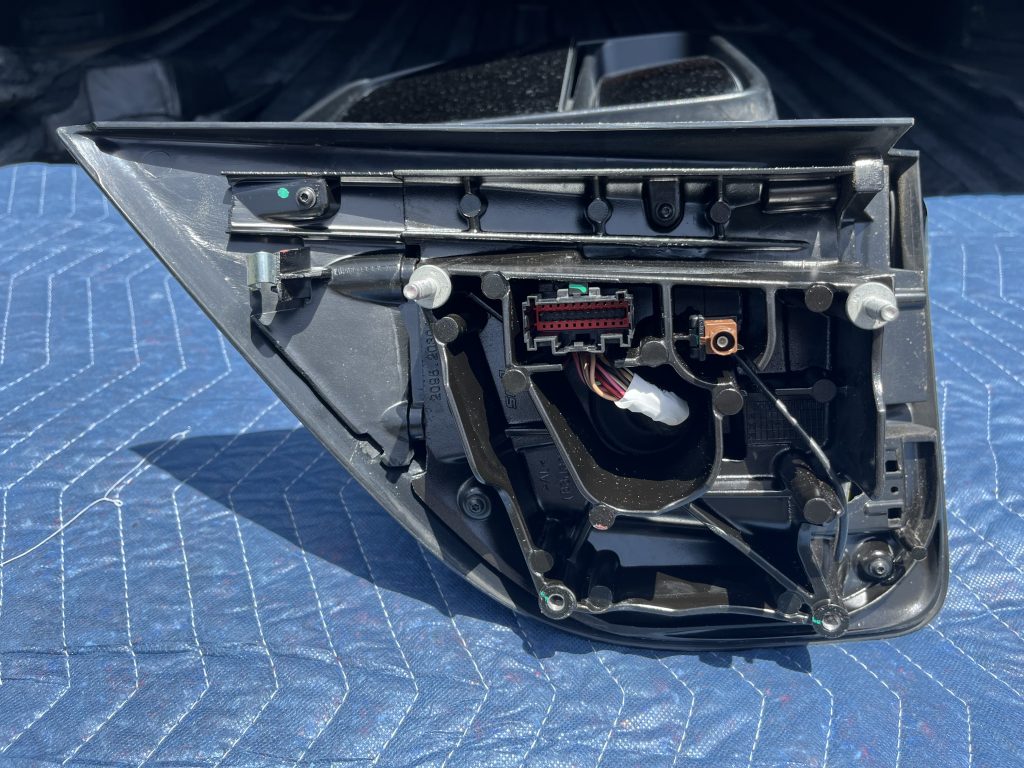
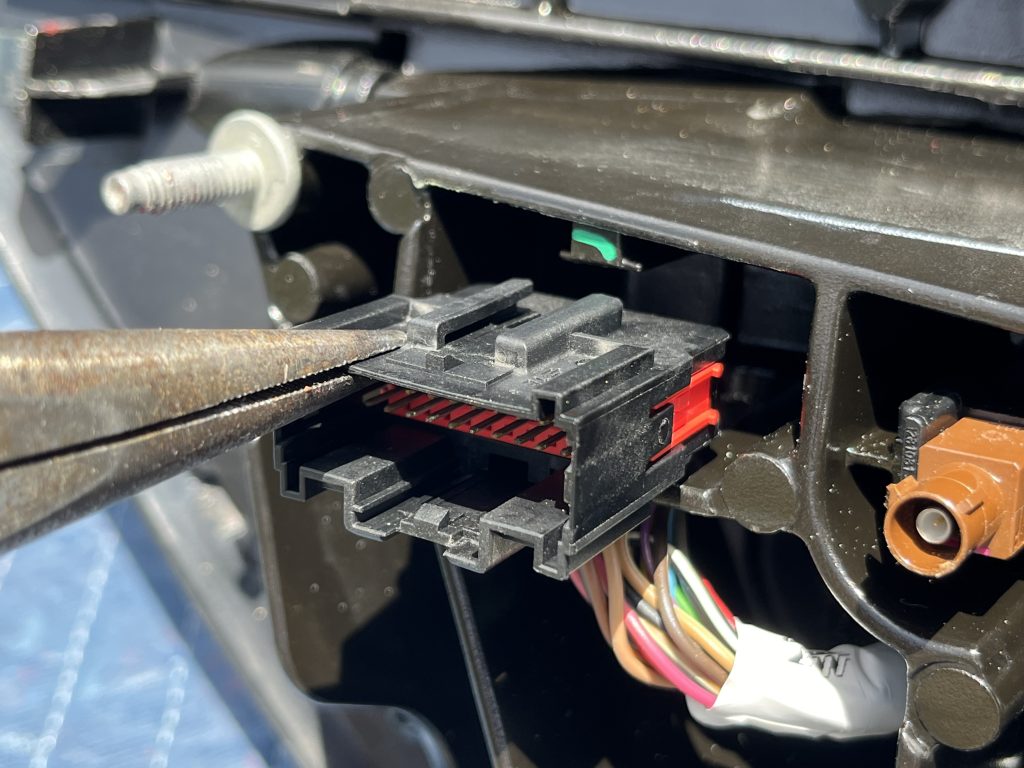
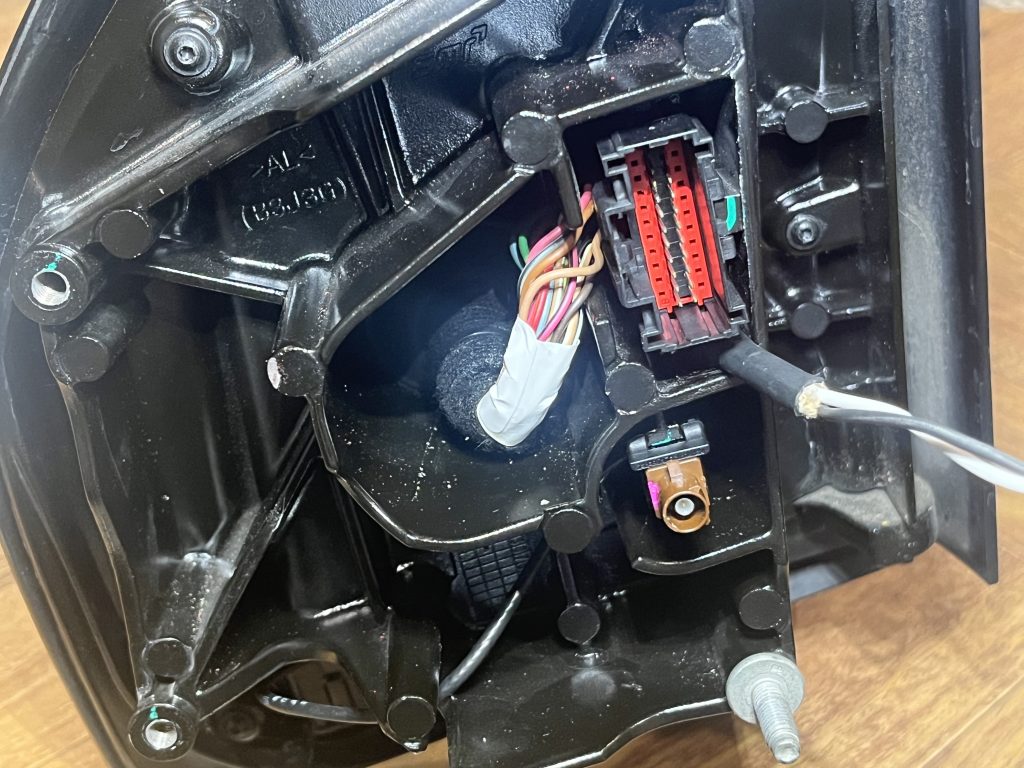
Step 3b: Using needle-nose pliers, carefully pull the connector straight out. It is only held in place with friction. Please take care to not put the pliers too far in so the pins do not get bent!
Step 3c: Warning! Please make sure the mirror is at room temperature before proceeding further! You do not want to drill a freezing mirror as the plastic could crack!
Locate the 5/16″ pilot point drill bit from the hardware packet and install it into your drill. Move the wire harness and large connector off to the side so it won’t get damaged by the drill bit (you do not need to move the camera connector if you have one). Note: photo shows no harness for clarity purposes only. Find the vertical section where the connector mates to and drill a hole in the flat area. Note: some mirrors are made from cast metal while others are plastic with ribbing, as the mirror in the photo to the right shows. The cast metal mirrors do not have ribbing. Drill the hole all the way through to the outermost exterior of the mirror, as this is where the S2’s cord will pass through, taking care to keep the drill straight. Note: you will encounter less resistance when the drill bit makes its way through; there is a bit of a hollow space until you start drilling again into the outermost exterior plastic of the mirror. Please take your time and go slow! The next photo below shows the hole drilled into a mirror that is cast metal, the location is different slightly and is not super critical. The important thing is to make sure the drill bit is on a flat area that is large enough to accommodate the diameter of the drill bit.
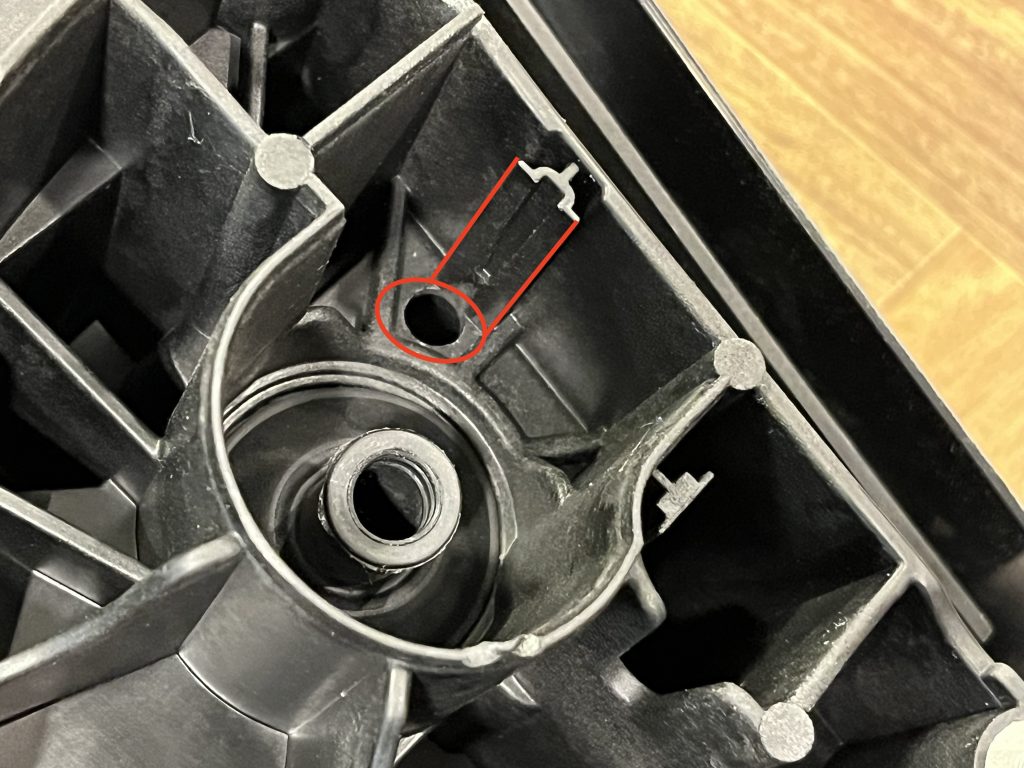
Step 3c (continued): Photo showing the hole drilled on a mirror that is cast metal.
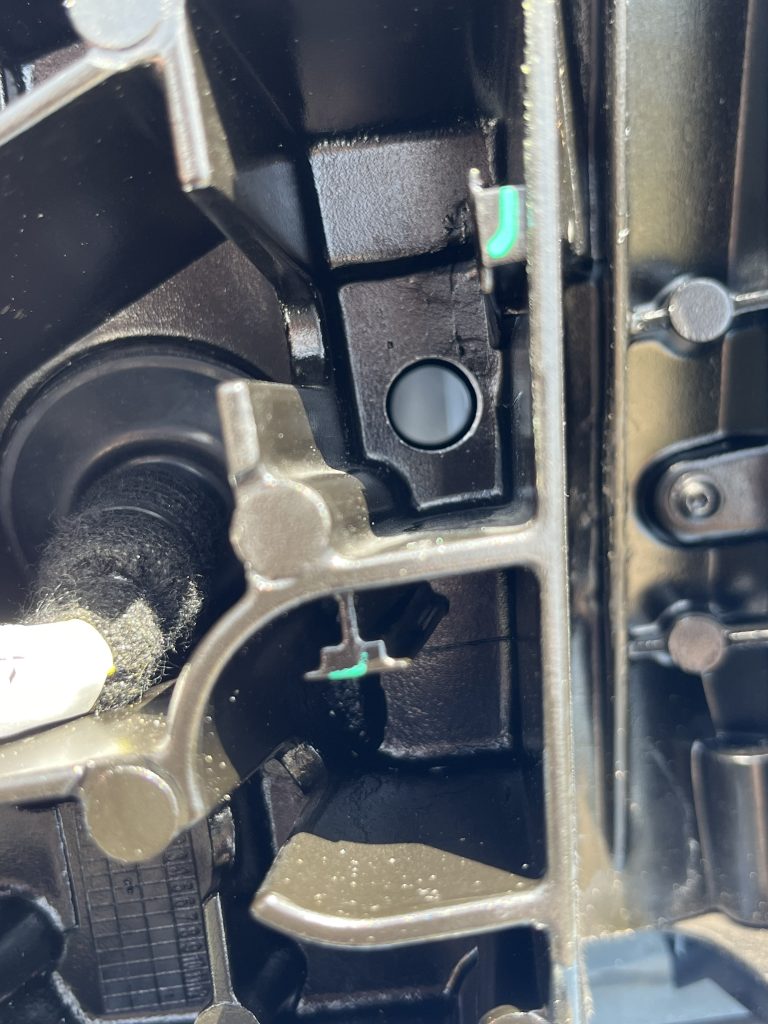
Step 4a: Slide the mirror mount/light assembly onto the uppermost portion of the mirror; it fits between the fixed portion of the mirror and the rotating arm. The fit is tight; keep pushing until it does not go any further (photo shows how far it should be). Feed the S2’s cord through the outer exterior plastic and into the area you previously drilled. Make sure the cord grommet from the hardware packet is installed and in the correct orientation (small diameter end facing towards the mirror’s exterior plastic)! Proceed to seat the grommet into the drilled hole. It is a tight fit; just take your time. A small plastic pick carefully depressing around the periphery of the grommet can help if your fingers cannot reach the area.

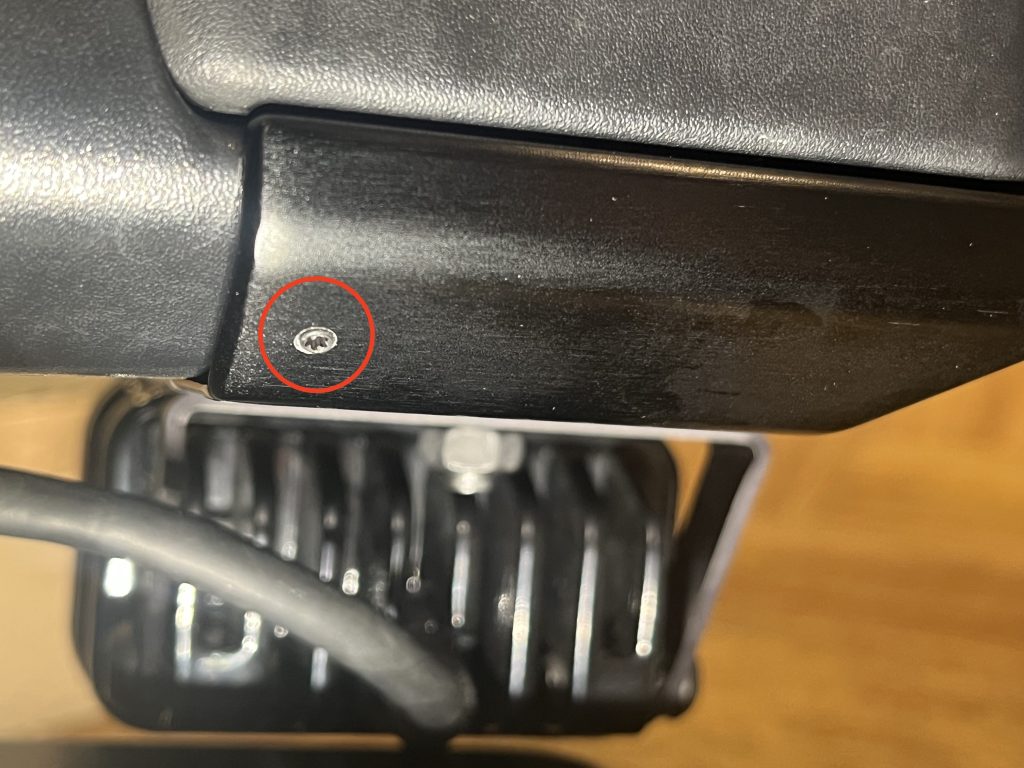
Step 4b: Locate the small Torx L-wrench and one set screw. Please take care to not lose the set screw!
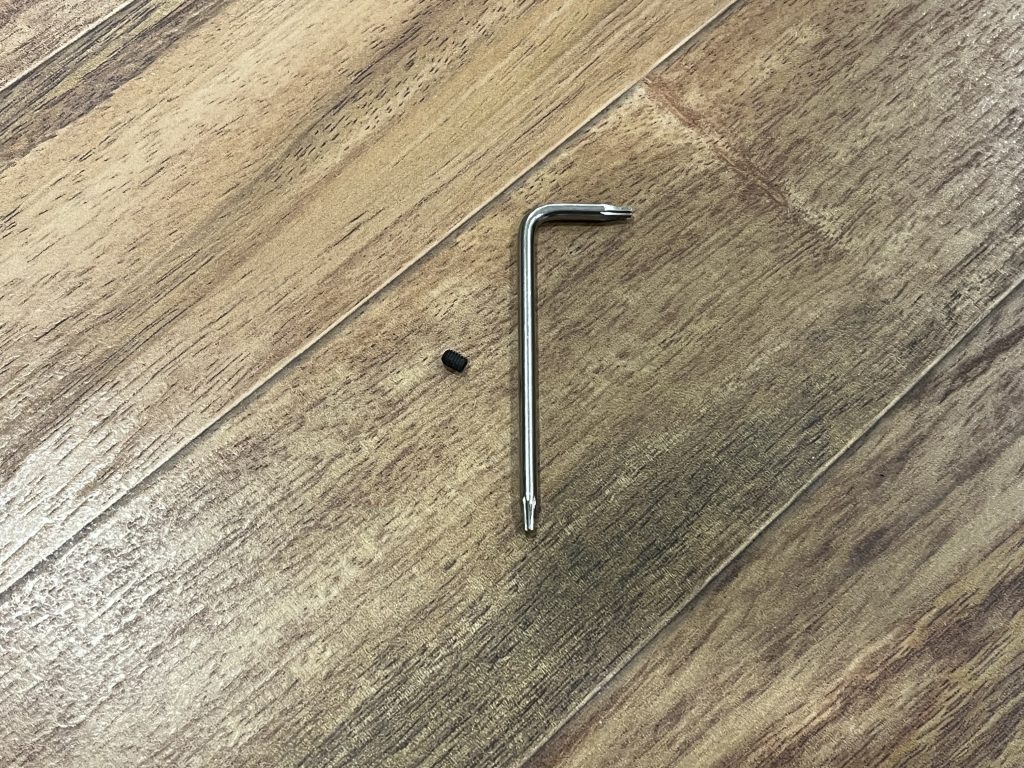
Step 4b (continued): Carefully thread the set screw in on the backside of the mirror mount/light assembly. Please do not cross thread it and DO NOT use Loctite! Screw it in until the head of the screw is exactly flush with the surrounding metal surface. DO NOT screw it in further! Push the S2’s cord in to get to an acceptable level of slack length to allow the light to rotate. The photo example shows a good slack length.

Step 4 completed: Photo showing the completion of Steps 4a and 4b. You may optionally fill the screw’s head in with black silicone for a security measure.
Step 5a: Route the S2’s cord in the area shown and push the large electrical connector back onto its vertical retention surface. It is friction fit only and will only go so far before it stops.
Step 5b: Reinstall the foam insulator on the mirror.
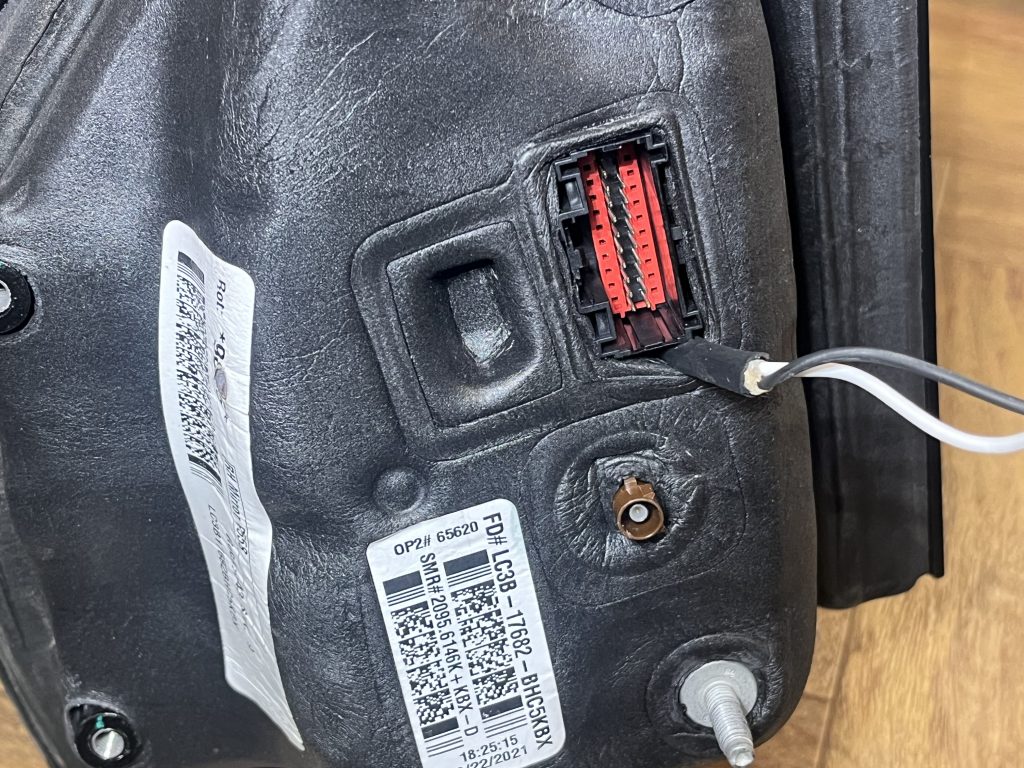
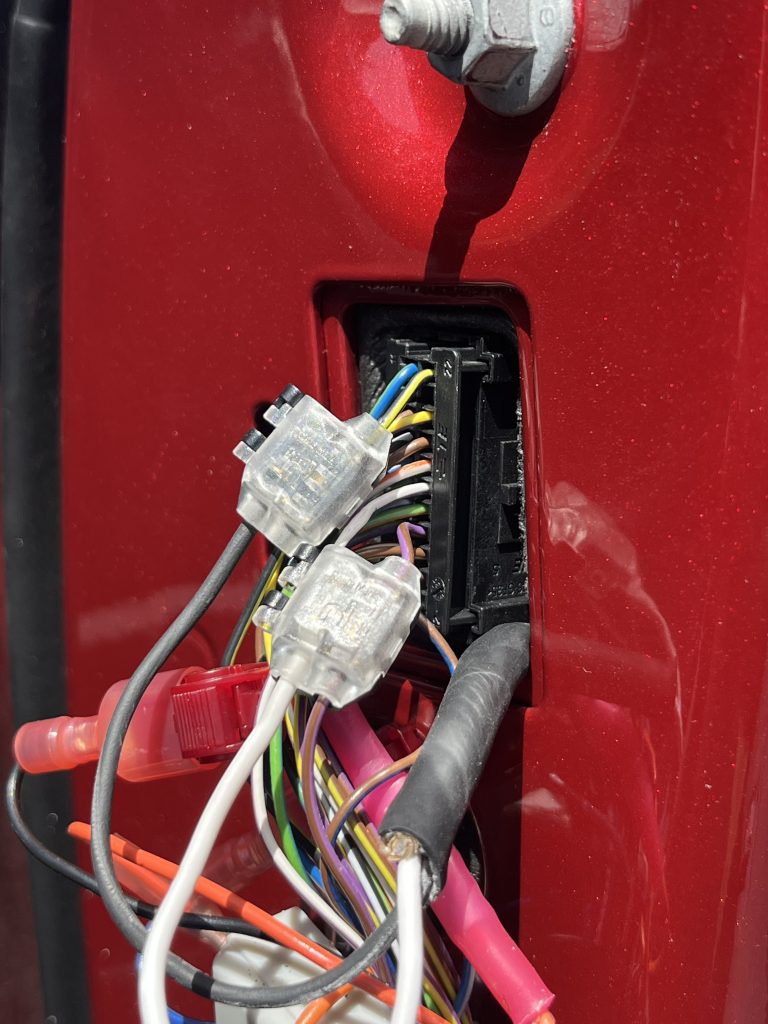
Step 5c: Reinstall the mirror onto the door, making sure to route the S2’s cord through the rectangular opening in the door sheet metal. Reinstall the two factory hex nuts and two bolts and torque to 80 inch-pounds (9 newton-meters). Plug the factory electrical connector(s) back in, and place the wire harness retainer back onto the lower hex nut’s stud. Please ignore the red wire taps and the white module in the photo.
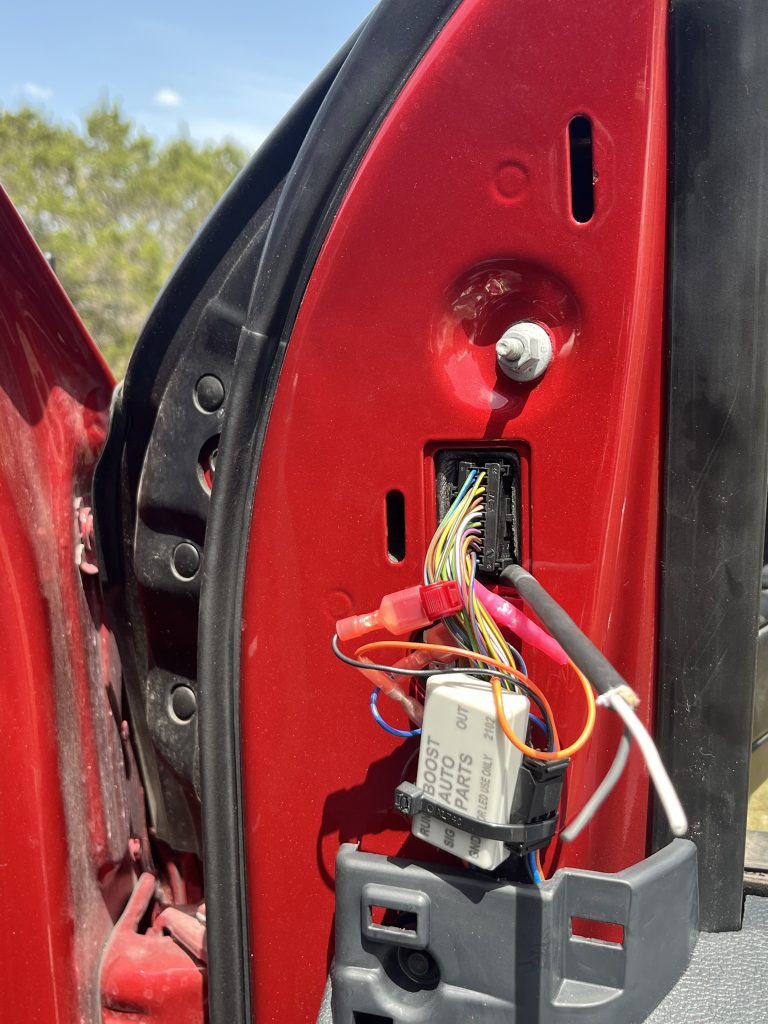
Step 6a: Locate two of the clear/black wire connectors from the hardware packet. If your S2’s cord is too long, you will need to cut it shorter, making sure to leave enough length to allow connections to the factory harness. Please ignore the red wire taps and the white module in the photos. If necessary, carefully pull back some of the factory tape on the wire harness; DO NOT use sharp instruments or force here!
Note: factory wire colors on your truck may be different than the photos shown for this step. Please go by wire location number instead!
Insert the S2’s black wire into the portion closest to the hinge of the wire connector. Locate the factory wire that goes to wire location 22 (ground). The location numbers are tiny and raised on the connector surface in four places. Wire location 22 should be the upper right location of the connector.
Place the factory wire into the slot of the wire connector (furthest portion away from the hinge). While making sure that the S2’s black wire and factory wire do not pop out, carefully squeeze the clamshell lid of the connector shut. You may use needle-nose pliers to do so.
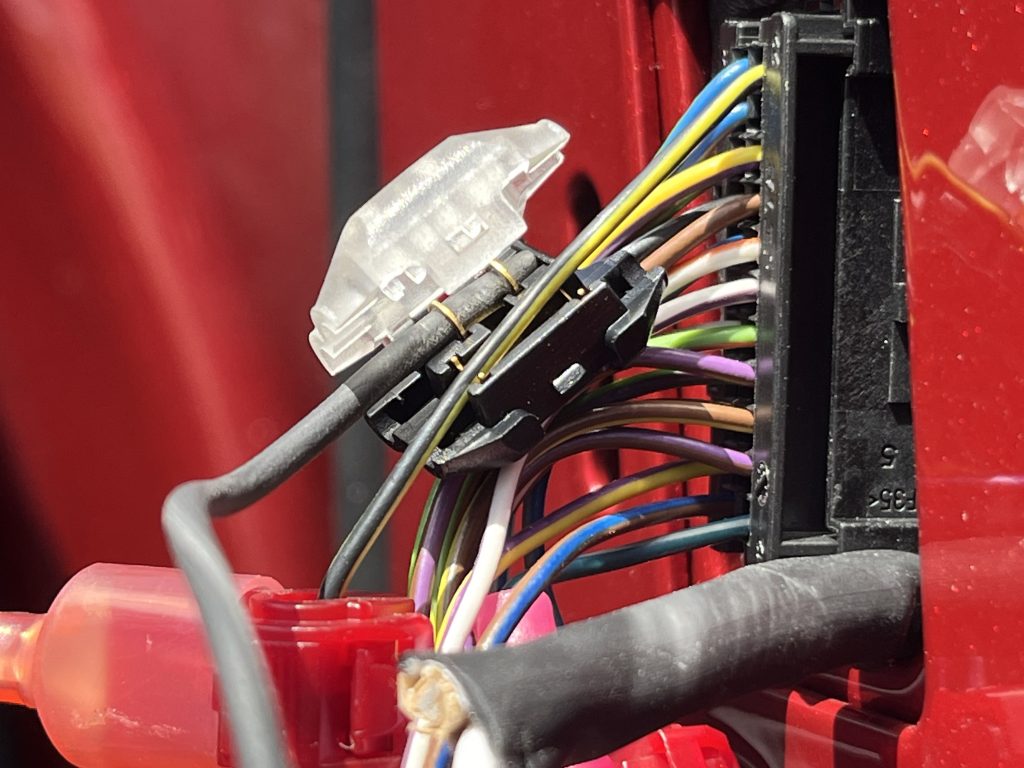
Step 6b: Repeating the above procedure, insert the S2’s white wire into the portion closest to the hinge of the wire connector. Locate the factory wire that goes to wire location 15 (mirror spotlight positive).
Place the factory wire into the slot of the wire connector. While making sure that the S2’s white wire and factory wire do not pop out, carefully squeeze the clamshell lid of the connector shut.
Step 6c: Reinstall the door trim ‘sail’ panel, making sure that no wires get pinched. We have provided four new sail panel clips (orange color) in the hardware packet if any of your factory ones broke.
Install completed! Repeat for the driver side, reconnect the ground terminal on your batteries and enjoy! Your S2 lights will come on with the factory mirror spotlights now. If you would like to adjust the rotation of the light, simply use a 10mm wrench to loosen the hex nut slightly and then retighten; DO NOT over-tighten!
This is a living document and may be improved over time. Last Updated: April 5th, 2025 – 8:30 PM CDT