
Disclaimer: You are responsible for making modifications to your truck. Subtle Design will not be held responsible if you damage your truck or any of its parts. Please take your time and enjoy the process.
Installation
Estimated Time: Less than 30 minutes.
Step 1: Lower the spare tire to provide more access and comfort to work.
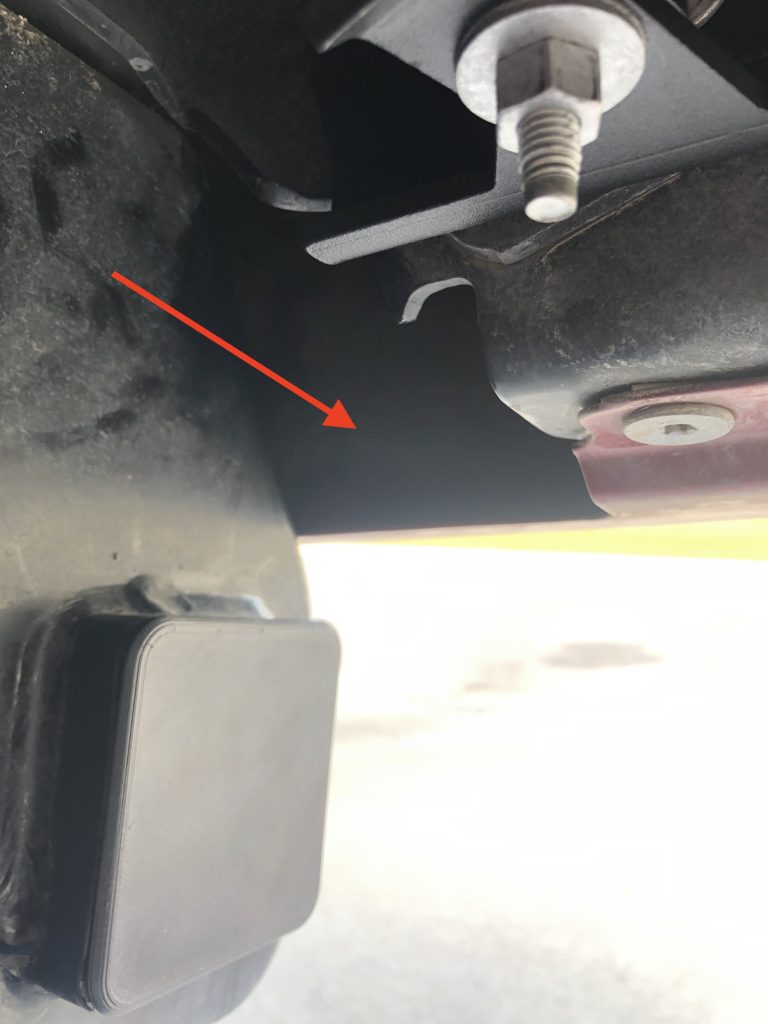
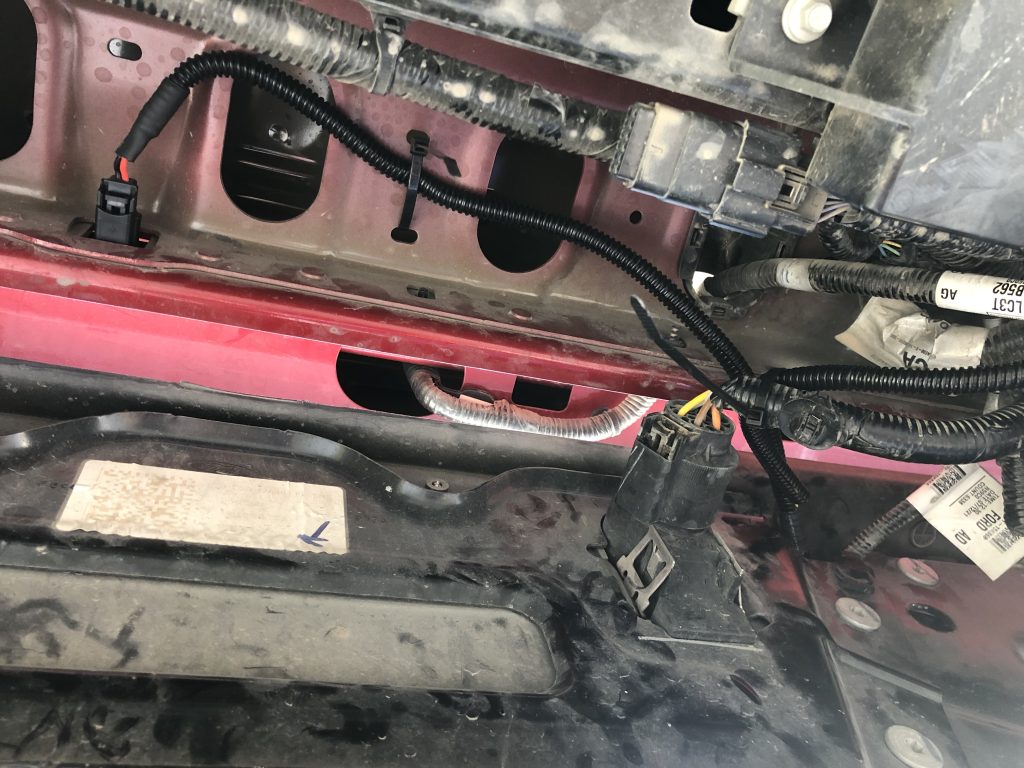
Step 2: Locate this area of the rear bumper on the driver side. You will access the OEM license plate lamp connector and route the Subtle Design DRW module and harness here.
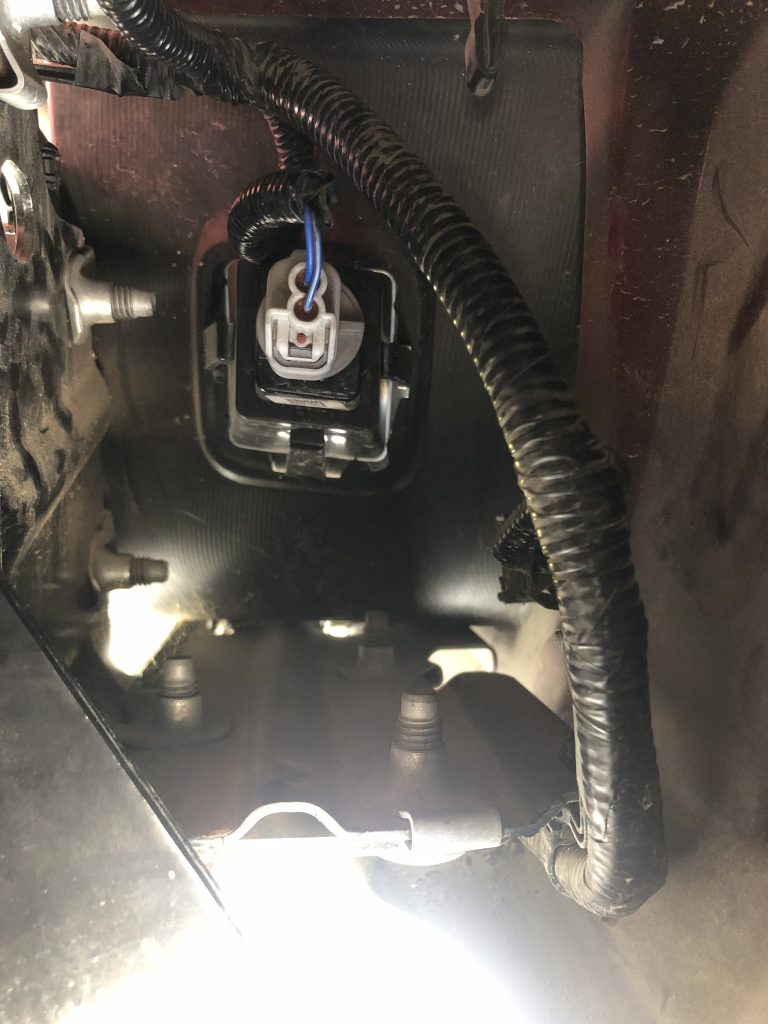
Step 3: Unplug the OEM license plate lamp connector on the driver side. You may need to wiggle it slightly if dirt is packed into the tab release of the connector.
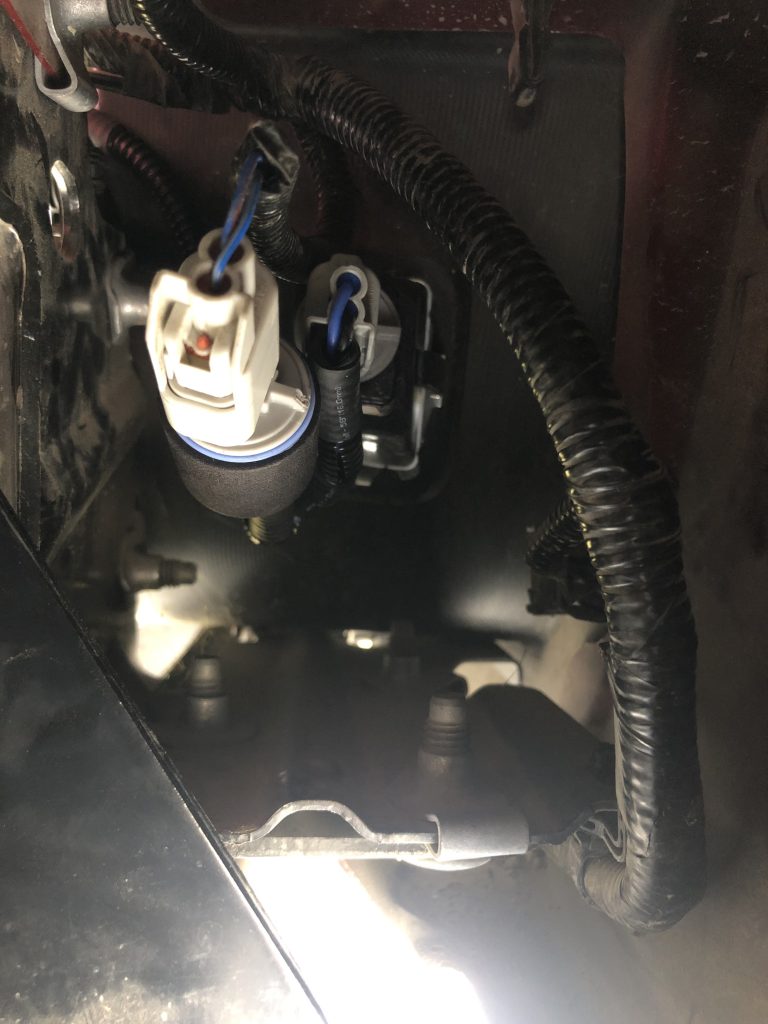
Step 4: Plug the OEM license plate lamp connector into your Subtle Design DRW module connector, and plug the short end of the DRW module harness into the OEM license plate lamp.
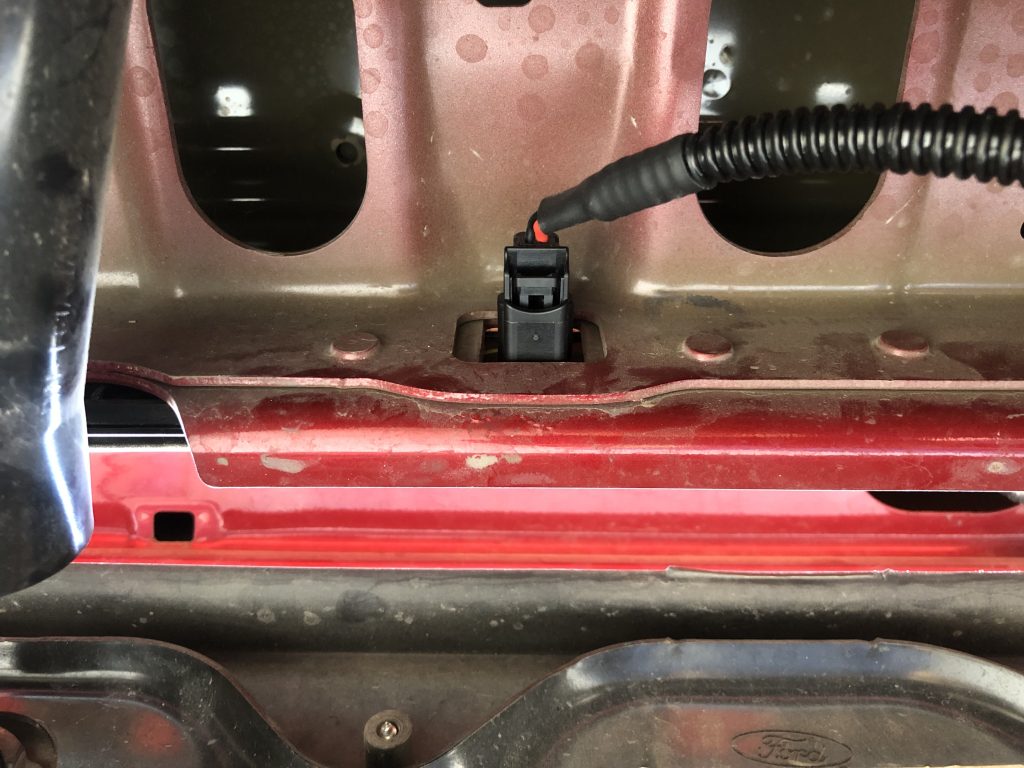
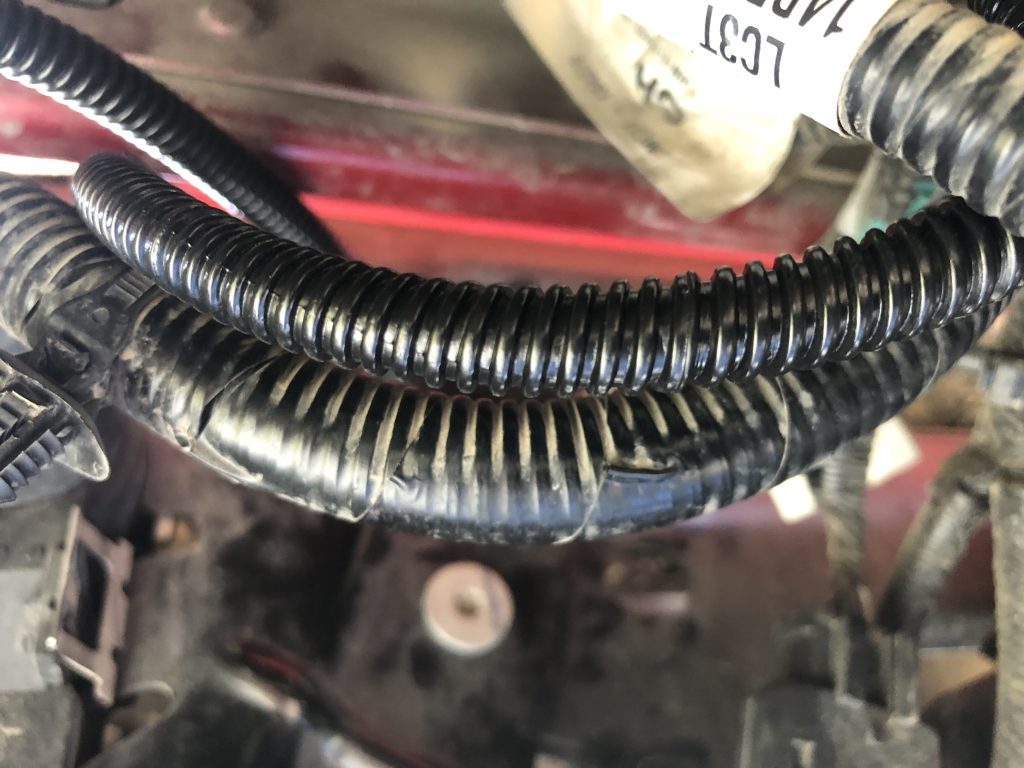
Step 5: Route the long end of the Subtle Design DRW module harness up to this area shown in the photo, nearby the trailer connector socket.

Step 6: Continue routing the harness to the square cutout where the OEM DRW light bar connector passes through the body, and plug the harness into the light bar.
Step 7: Full routing of harness shown in the photo. You may optionally use a zip tie to secure the harness in place.
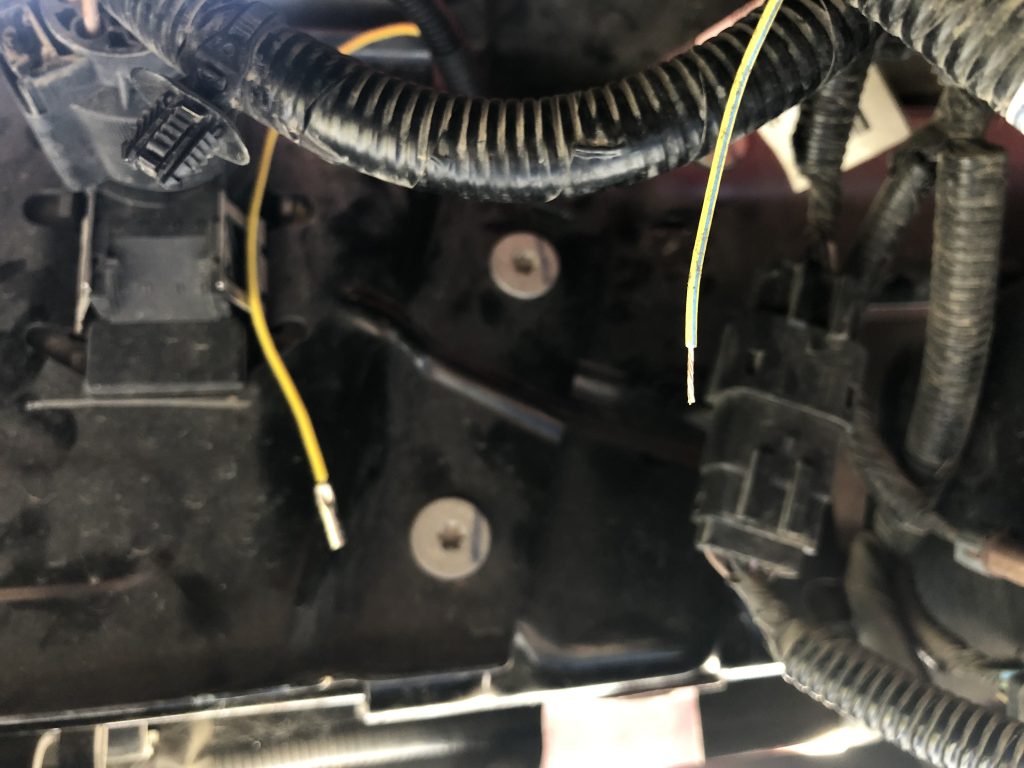
Step 8: Locate the factory, yellow-colored, ‘High Mount Stop’ wire in the area around the spare tire. It is typically taped to another harness.

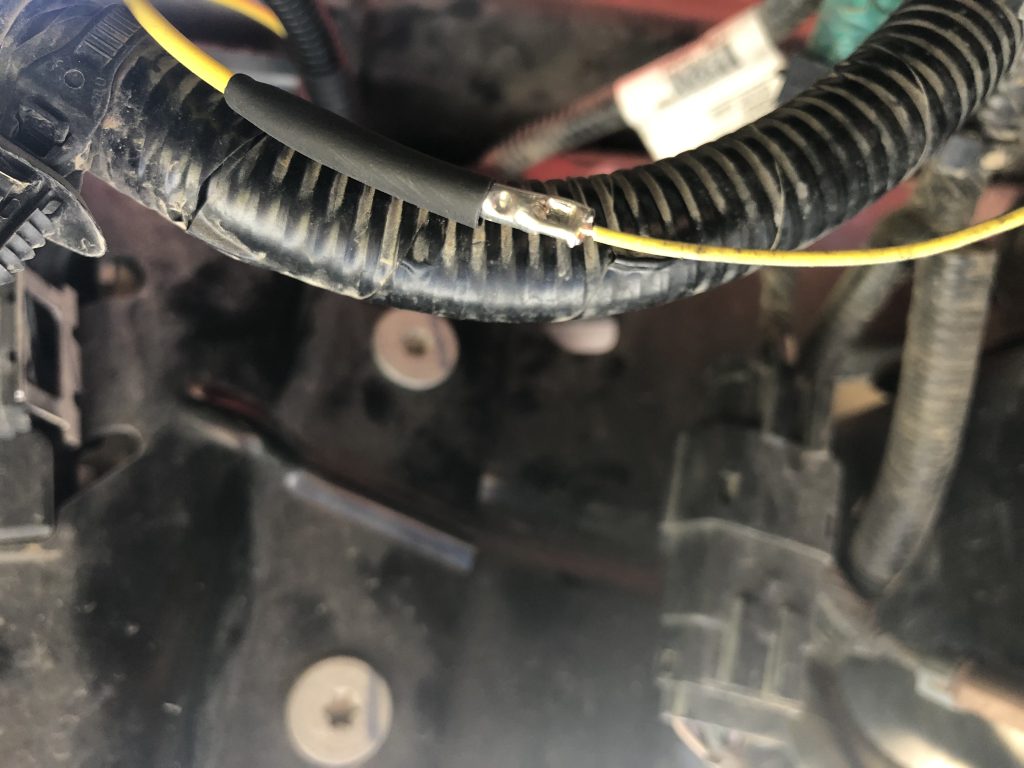
Step 9: Strip approximately 3/8″ of an inch from the end of the factory wire. Route the yellow wire from the Subtle Design DRW module to this area.
Step 10: Slide the supplied piece of heatshrink tubing over the end of the DRW module yellow wire.

Step 11: Crimp the DRW module yellow wire onto the factory yellow wire.
Step 12: Slide the heatshrink tubing down and centered over the crimped area. Heat the tubing until it shrinks around the crimped area. You may see adhesive flow out of the ends, this is normal.
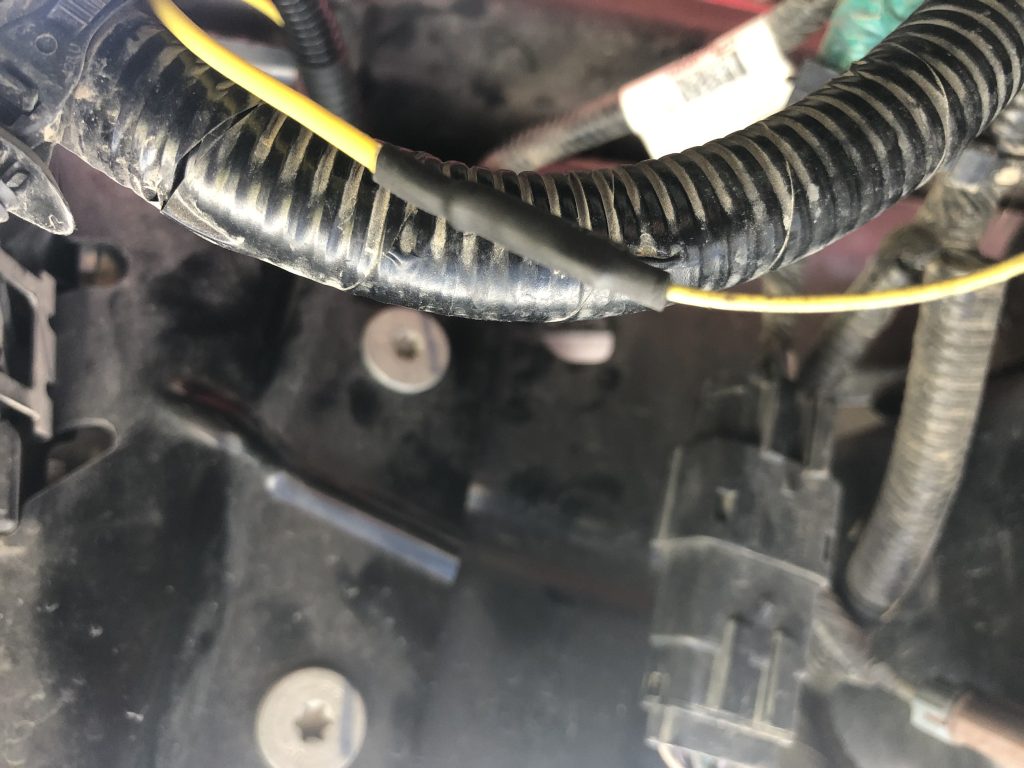
Step 13: Install the supplied piece of split loom onto the newly joined yellow wire.
Install completed! You may now raise the spare tire.
This is a living document and may be improved over time. Last Updated: April 6th, 2025 – 11:07 AM CDT